Monday, December 9, 2013

Finally some results

My momentum to finish these new forms had stalled out a bit.
How to tie different styled works together?
How much or how little wire and/or paper to use and not cover up the forms themselves.
Where to begin?

It took a friend coming over and asking, "What are these forms about?" and "what are you trying to say with the wire?" to get my brain to mulling and pondering it all again.

Since my work is about the process as much or more than the end result, I determined minimally that these forms have something to do with rocking cradles and boats, are figurative, representative of some remains or essence. The wire is playful line, an outline of form, a skeleton and foundation, a structure for the paper. The fragile paper is the opposite of clay, translucent but not transparent.

So, guess these forms return me to old ground of trying to show both the inside and outside at the same time...inner beauty defined by the outer form.

Got busy and got a few started and possibly completed...


Wednesday, September 25, 2013

Coming along but a ways to go...

Bisqued piece with nichrome wire ready to be cooked
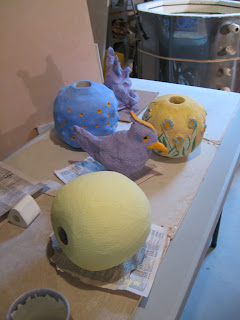
My head continues to think in pod shapes and I'm adding holes, sometimes deliberately and sometimes as the spirit moves me. Here are some of the solid porcelain shapes.

Some of the shapes are being made in a dark stoneware with a white wash. Others are stoneware with layers of underglaze that will be sanded through... So many variations, but hard to see where this is going without getting any of them DONE to assess it this is a good way to go or not... having fun and making a lot of little fine crumbles that I'll have to slake down and recycle into something else... maybe a cast piece of some sort . . . with wire inside of it?!?

Wednesday, September 11, 2013

More wire and clay?

I thought that my series of making vessels for wiring up had run its course. Then these forms came to mind, so have to see where they will lead.

I see these as fairly figurative form with a ghost-like silhouette. Two influences I must be following:  earlier work by Christine Bourdette and the subtle forms of Amanda Salov, from whom I acquired a swell little dish last spring sporting this same shape.

The white pieces are porcelain. The dark brown stoneware shapes were layered with grolleg slip, with some edges left showing their brown bodies.

I can see a variety of ways to "lace" these up with wire... can't wait to get them bisqued so I can begin.

Sunday, August 25, 2013

Stack Workshop #2

                           
Second weekend of stack piece making... a second weekend that started out cloudy, drizzly and with questionable weather. Lucked out again, tho. Had just enough sun to get everything cut out, made and finished and into the kiln to dry. 


They were still on the moist side the next day, but dry enough to glaze up. This group attacked the glazing with a vengeance of multiple colors on their textured pieces. 
Ann and Hester.
Susan takes a brief moment to contemplate.
Susan and Lynda.


Bold forms from Lynda Farmer

Whimsical marks and brushwork by Susan Pachuta

Texture Queen: Hester Coucke

Kid drawings have helped Ann Larh perfect her brushstrokes.


Friday, August 16, 2013

Two New Works

Finally finished up two new pieces to take to a new gallery end of the month. Both are with deliberate layered and sanded through glazes, but one uses a blue/purple color scheme that I snitched from one of my workshop students. Yay! for students with new ideas. I did tell them I was going to copy them at least...

"Unintended Consequences" 
"Unintended Consequences," Other Side 
Fake Tiny Barb Wire
Have long been fascinated by creating two pieces to work as a whole. This time made it one whole piece from the start. The two halves were envisioned as being even more distinct, but as I carved away they "twin-ed up."

Took this piece to my Critique Group with a single silver wire spanning the gap. The wire connecting the two sides was always part of the piece in my mind, but since both halves were connected as one piece it made less sense to everyone. Then someone had the idea to make it barbed wire. CLICK!! After wrapping and cutting tiny wire, a coat of black paint. Now the two sides are tied together even more -- but with a slight twist of irony that only some will catch.


"Time Will Tell" is a return to a favorite shape, trying once more to try and get it perfect. This looks good to me now, but whether it will hold up to future pieces...? Only time will... 

"Time Will Tell"

"Time Will Tell," Other Side


Monday, August 12, 2013

Form and Function Working Together


My Neighbor and OSU Emeritus Prof Michael Burgett gave me a quick tour of OSU's Honey Bee Hive Laboratory where a piece he'd commissioned from me is hard at work. (See original post.)

At the beautifully landscaped lab, they have working hives of many different designs, including my pottery hive, created to look like a Greek-style Hive used centuries ago and also today.


Underneath a marble lid you'll find rows of wooden slats.
Each slat is spaced the distance bees like to make their combs.
It appears they like using it. Comb in process.
Comb being filled with honey.
A couple other types of hives: European-style, and how the bees did it before we humans decided we would like to harvest some of their hard work... 


Saturday, August 10, 2013

Stack Workshop

Finished Works!


Experimental re-glazed piece and lil' monster peeking out from behind. 


Stack pieces made the day before, dried out overnight in kiln
Stack Toppers
The first Stack Starter Workshop held yesterday and today.

With the help of the sun, we cut out, dried out, pieced together and finished 3 simple shapes and a "topper" for a mini-stack. When the day started out drizzly--in AUGUST!--this workshop host was a little worried, but the sun came out just in time and dried things out pretty quickly.
Glazing Party: Annclaire, Alexis, Joni


Spent the morning flipping them and making sure edges were covered up so they didn't dry out too much. After lunch everything was dry enough to put together and finish up using ribs and surforms.

Everything spent about 17 hours at 175 degrees in the kiln over night and only a few cracks had to be filled in with paper clay this morning. 

Glazing party with Velvet and Duncan underglazes and everything back into the kiln to once fire up to Cone 6.


Annclaire, Alexis and M'liss


Tuesday, July 30, 2013

Some Results

Shown are three finished boat bowls with feet made as a special order for an Etsy customer who wanted something to fit a display shelf. These are all a bit shorter than the 22 inches long she wanted, but I hope they pass muster.

Was a little worried that I was oxidizing the helmer shino at the end of my firing to get the kiln to climb, but these were in the right spots in the kiln and still got the nice burnt orange color I love, and that she requested.

UPDATE: She purchased the second one.
Shipping costs were more than I'd expected. Glad this ended up being 20" so I could double box a 16" into a 20" box. A 24" box costs more than double a 20"-er. Difference of $20-$56!!


The layered glaze workshop had a slight set-back when I managed to blow up the pod pieces I'd created for them to work on. The class still had big enough chunks to sand through their layers and get some results. Shown are a nice variety of textures and variations of sanding techniques from the group.

NOTE: if you stop your programmable kiln in the middle of a cycle, make sure that the temp is BELOW the range you want it to return to, or it will climb to the next stage. The pre-heat went from being a long one to one that was way too short... at least you can see the results of both sides of each pod all in one photo.

Friday, July 19, 2013

First Mini-Workshop

These simple looking pieces belie the many layers of colors layered on them that will soon be revealed. Participants in my first mini-workshop came and glazed last night, inbetween talk about hot-flashes, the mean-street playgrounds on which we played as kids, and things learned in other clay classes.

Next week they'll return to these pieces after they've been bisqued to a lower temp than normal, to sand through to see what they get. Fun for me to see what color combos they chose opposed to the same old tried and true that I seem to do.

This spring I did a major garage and studio clean up with hopes I'd have room to host mini-sessions in my studio. It is an intimate space but seems to work... Next month I'm hosting two stack-making workshops. One is already full, but the second one has two slots open. FMI:  Clay Play with Cynthia

Wednesday, July 3, 2013

Revisiting an older form


At a customer's request, am trying to make a 22" long boat bowl with feet. Haven't made one of these in years and haven't checked shrinkage in awhile either. This started out over 23" and after the bisque it is already down to being under 22" long. Guessing it will be under 21" after the glaze firing... so would need to make a 24-25" piece to end up with one 22". 

It's got two hairline cracks on the other side from stress pushing it to dry fast and one inside, so now I'm doing what I tell my students not to:  spending time trying to do a patch with glaze, sanded clay particulate, and Apt II to try and fill in the cracks, but knowing my luck they will only open up and get worse in the glaze firing... It's only time and clay and gas to cook the mess. Oh dear.


Tuesday, June 4, 2013

Short Stack

Friend has been prodding me to make a short, smaller version of my stacks for some time because they might be more appealing size and price-wise. Finally had some time and inclination.

Found a little broken red lamp base at the Rebuilding Store that seemed like a perfect start, but the color red can be tricky. (See tiles below for these glazes post firing.)

Left a bit of surform texture on each of them for a second contrast color to sink into after I bisque them. 

Trouble with this is that the little small pieces take almost as much time as a large stack piece, just a lot less finish carving and glaze to paint them.


Greenware pieces, Cone 5 fired tiles.